TB Noxious
by C. Casquatch
LLMNR Poisoning Walkthrough
Scenario Overview
The IDS device alerted us to a possible rogue device on the internal Active Directory network. It also flagged unusual LLMNR traffic directed towards Forela-WKstn002 (IP: 172.17.79.136). As a Network Forensics expert, you are asked to investigate potential LLMNR poisoning on the Active Directory VLAN.
What is LLMNR Poisoning?
TCM Security’s article provides an excellent explanation:
- LLMNR (Link-Local Multicast Name Resolution) is used when DNS fails to resolve hostnames on a local network.
- It lacks authentication, which allows attackers to spoof replies and intercept sensitive data (like usernames and password hashes).
- Tools like Responder automate these attacks, capturing hashes that can be cracked offline with tools like Hashcat.
- Mitigation includes disabling LLMNR/NBT-NS, enforcing strong password policies, and patching systems regularly.
Step-by-Step Analysis
Step 1: Identify Most Active IPs
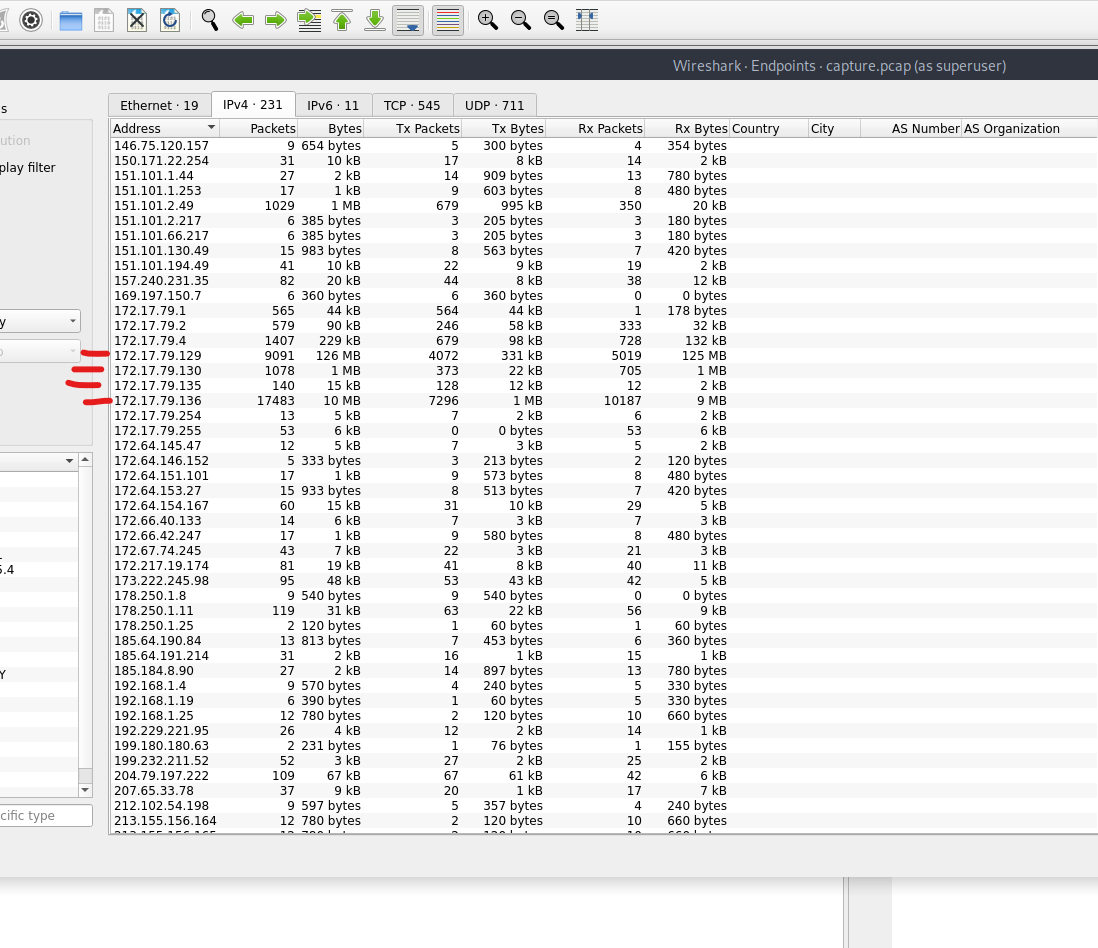
Open Statistics -> Endpoints in Wireshark to view the top talkers. Look for IPs close to 172.17.79.136 to understand the internal IP layout.
Step 2: Find the Malicious IP Address
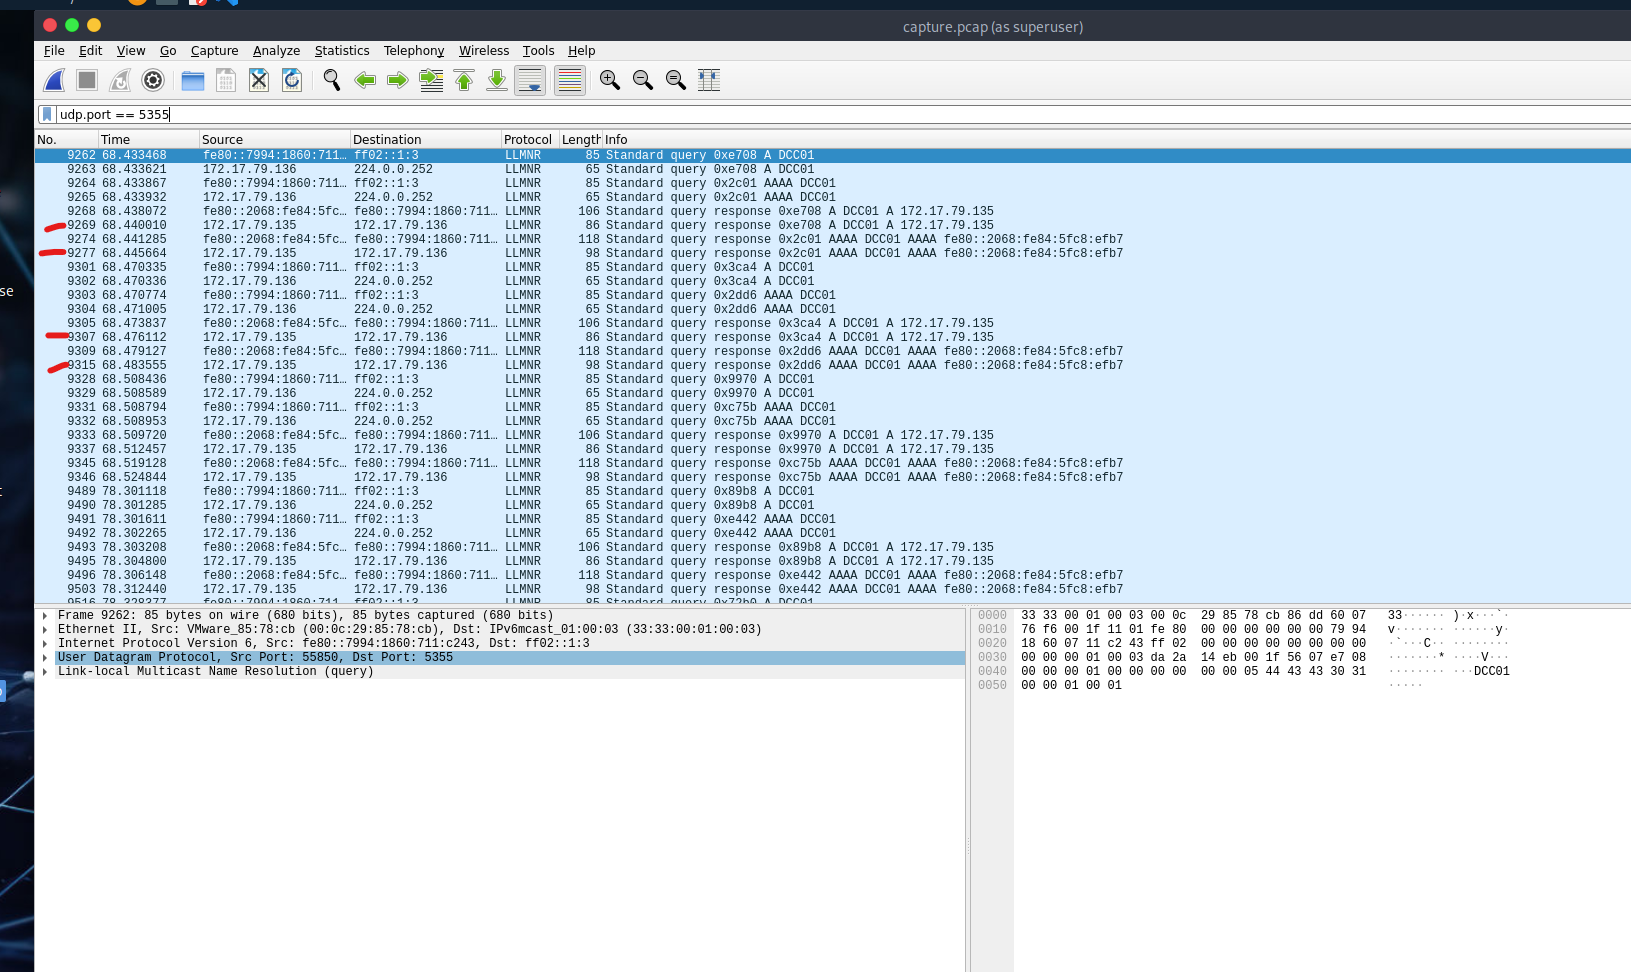
- Filter LLMNR traffic using:
udp.port == 5355 - Look for responses to queries from
172.17.79.136. Only one IP responds – this is our suspected rogue machine. - This IP is not the domain controller.
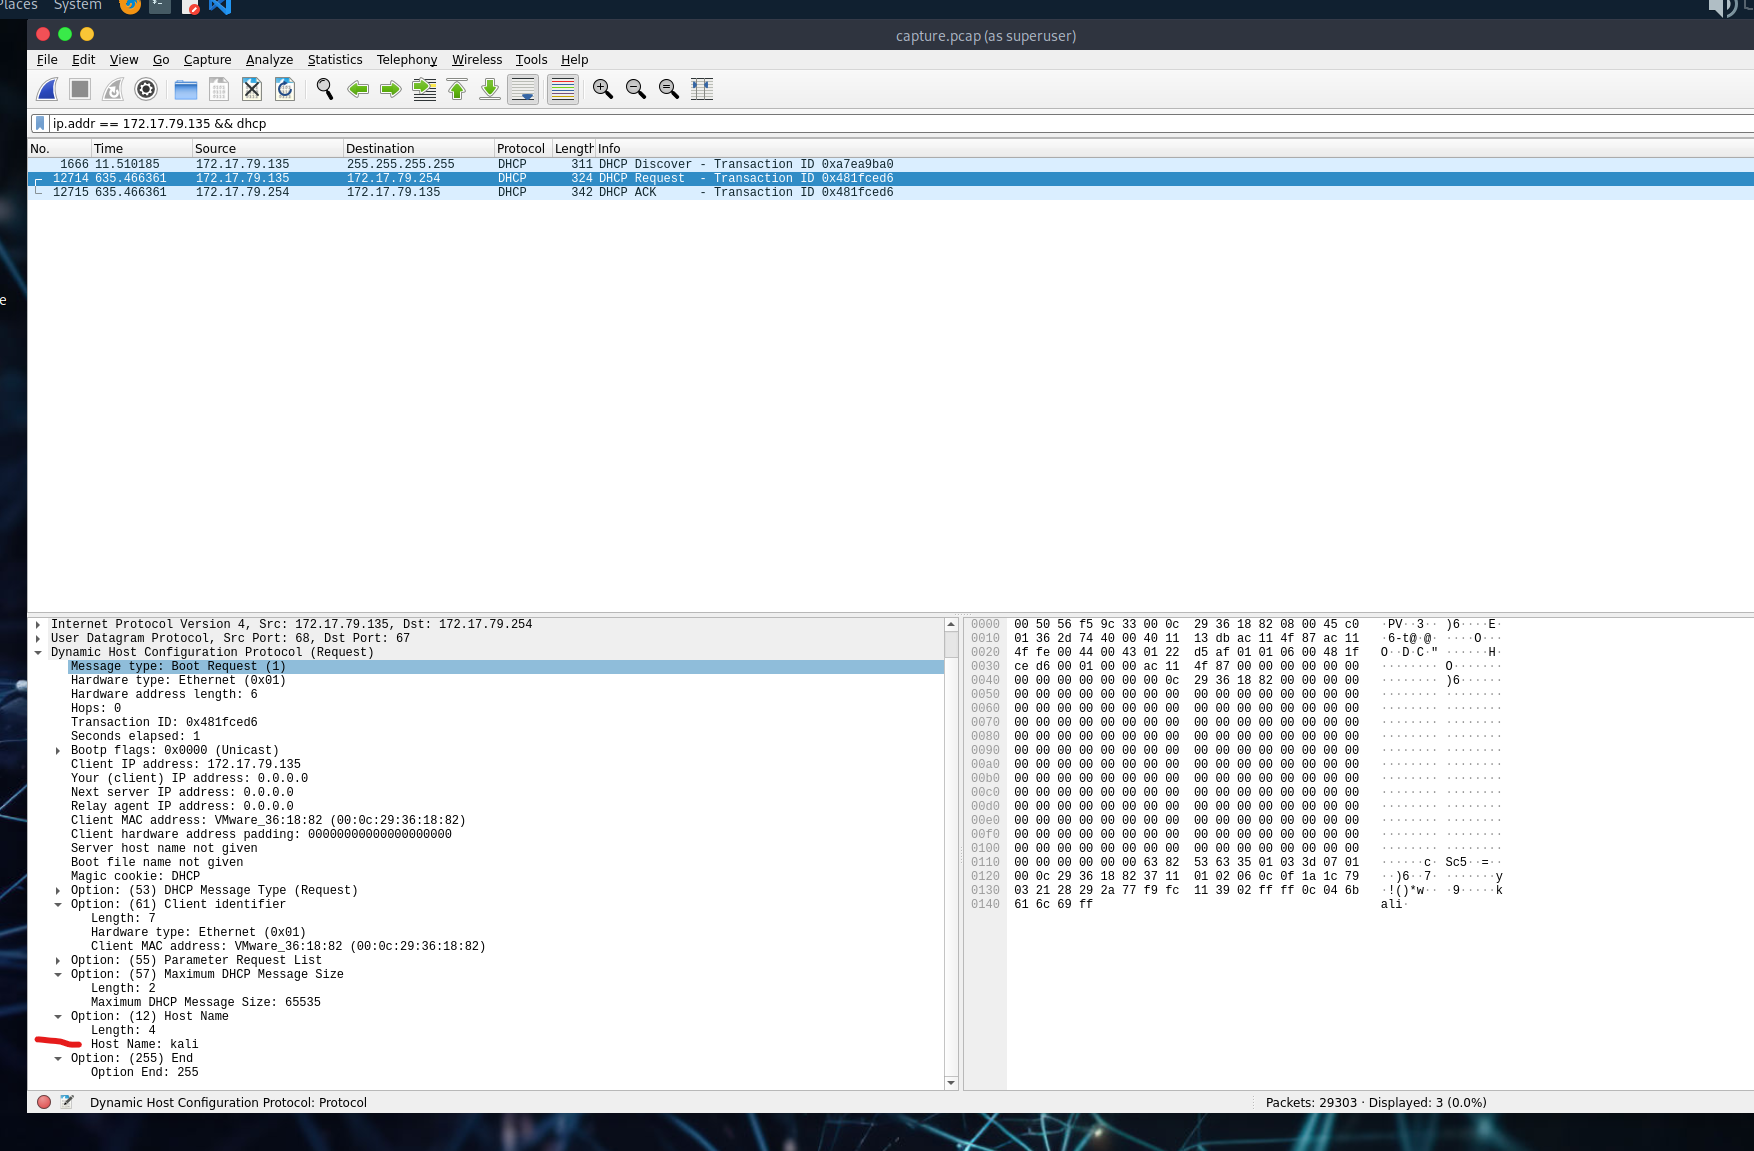
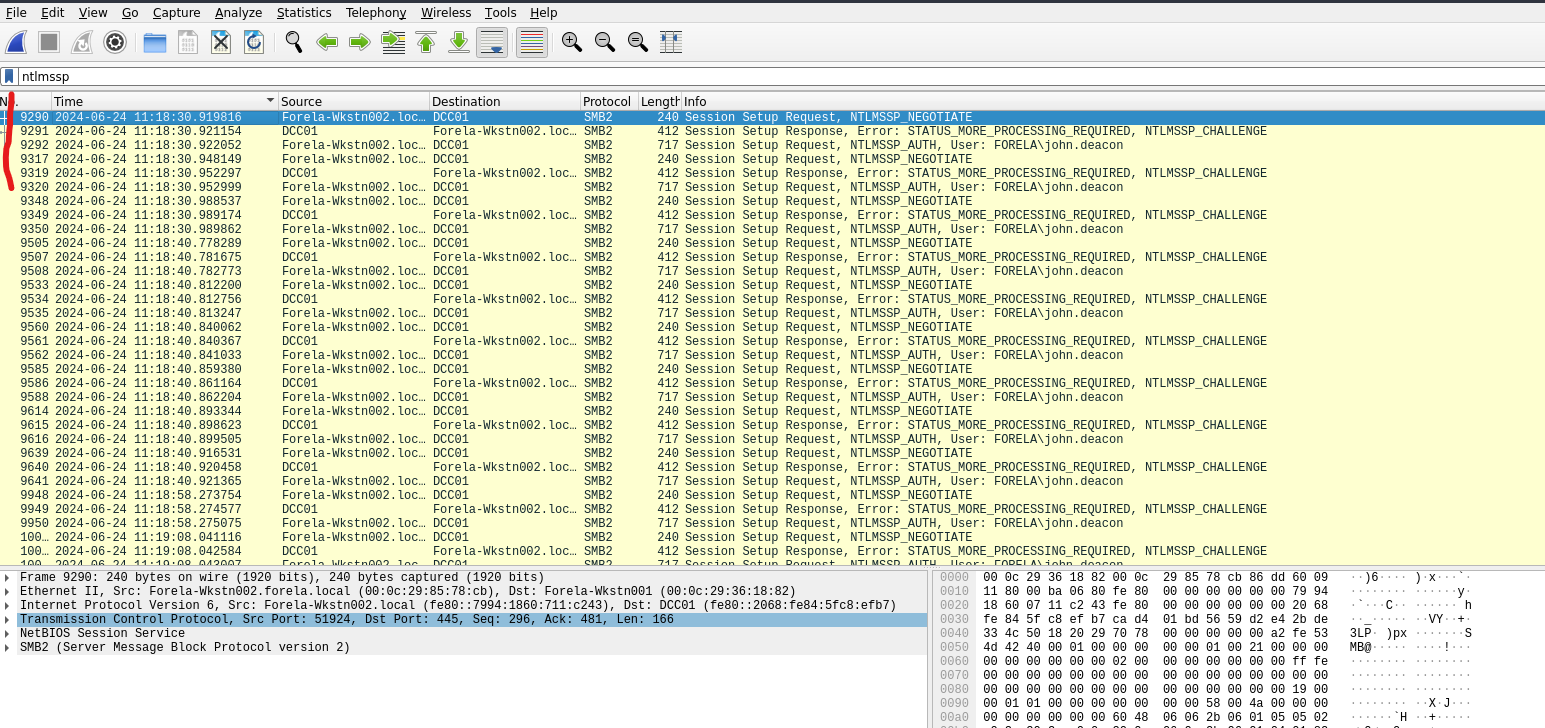
Step 3: Identify Hostname of the Rogue Device
- Use filter:
ip.addr == 172.17.79.135 && dhcp - Check DHCP packets for the hostname value.
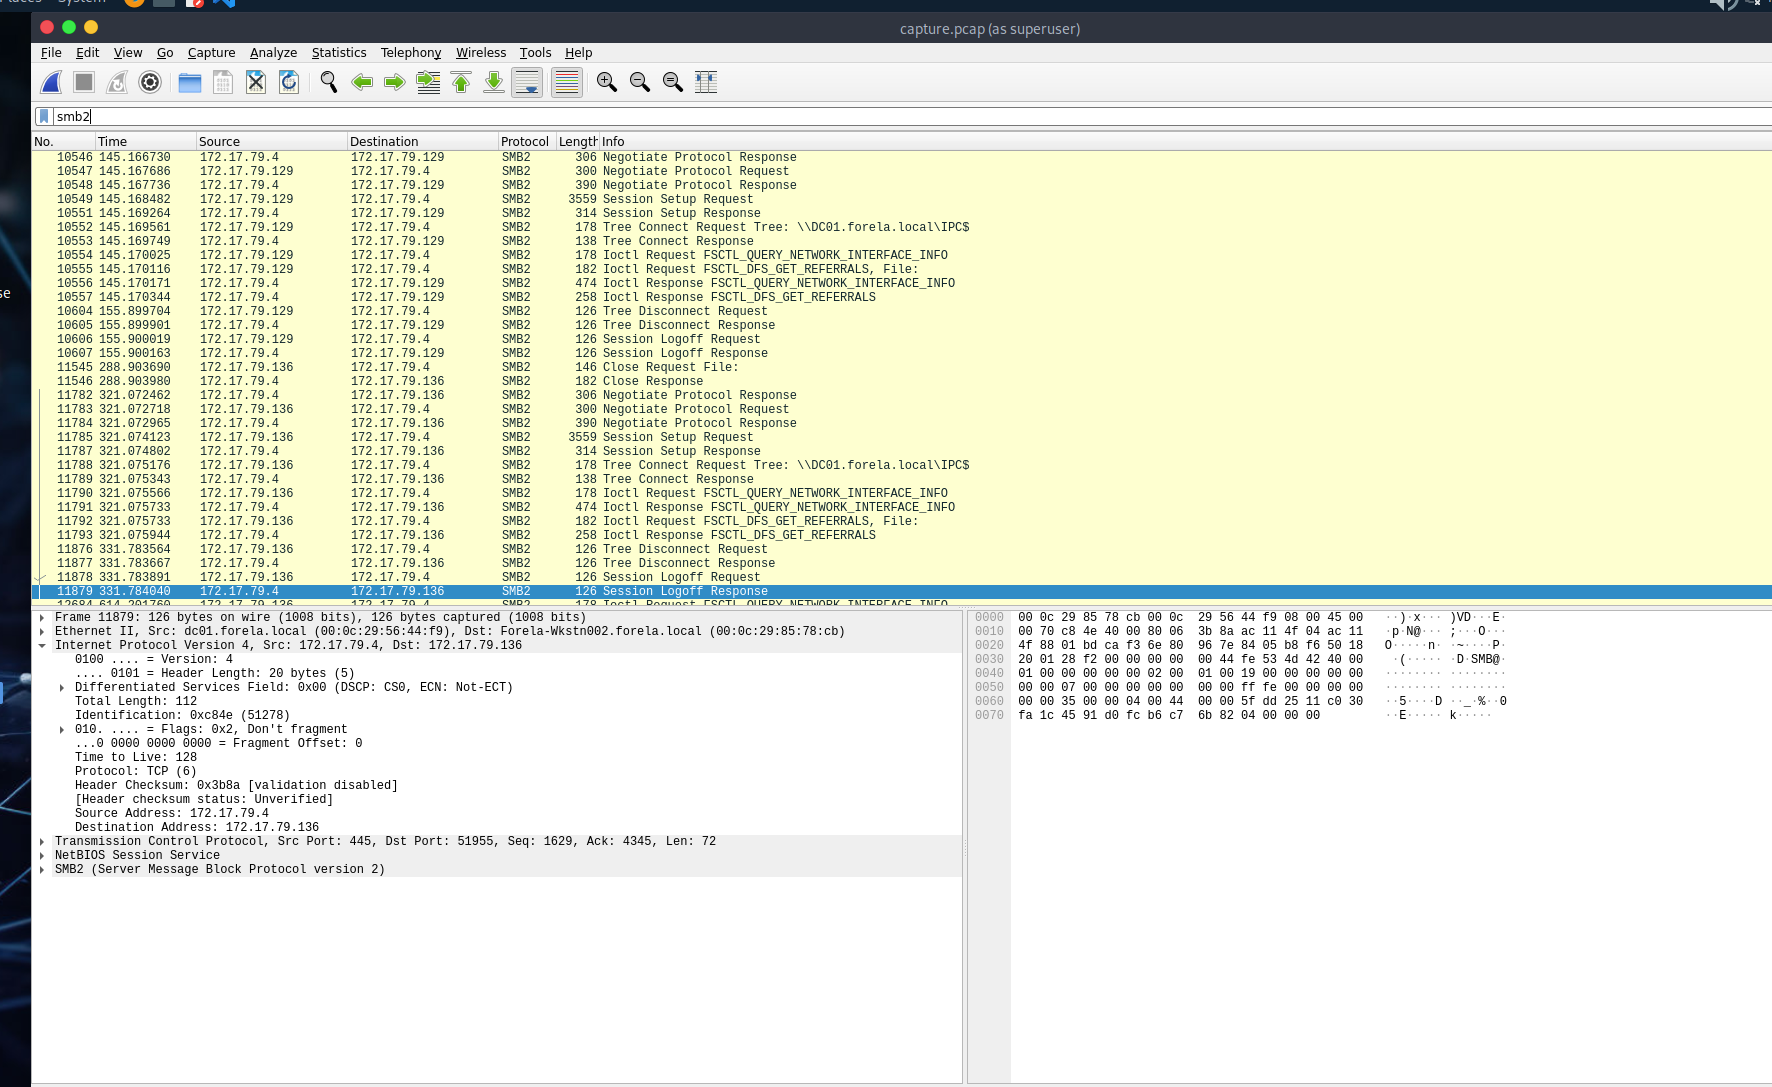
Step 4: Confirm Hash Capture & Find the Username
- Use
smb2to locate SMB traffic. - Then filter further with
ntlmssp. - Look for
NTLMSSP_AUTHpackets – you’ll find the username here.
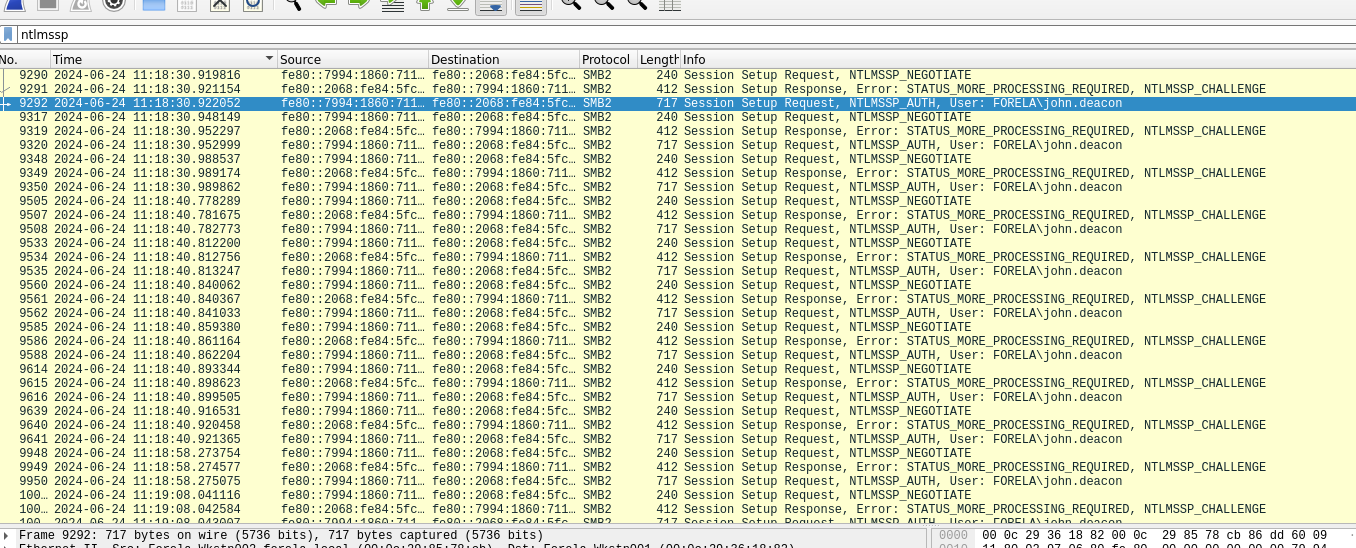
Step 5: Find the First Time the Hash Was Captured
- Make sure your time format is set to UTC.
- Check the timestamp on the first
NTLMSSP_AUTHpacket.
Step 6: Identify the Victim’s Typo
- Look for the hostname the victim tried to access.
- They mistyped
DC01asDCC01.
Hint: Domain Controller Controller? Oops.
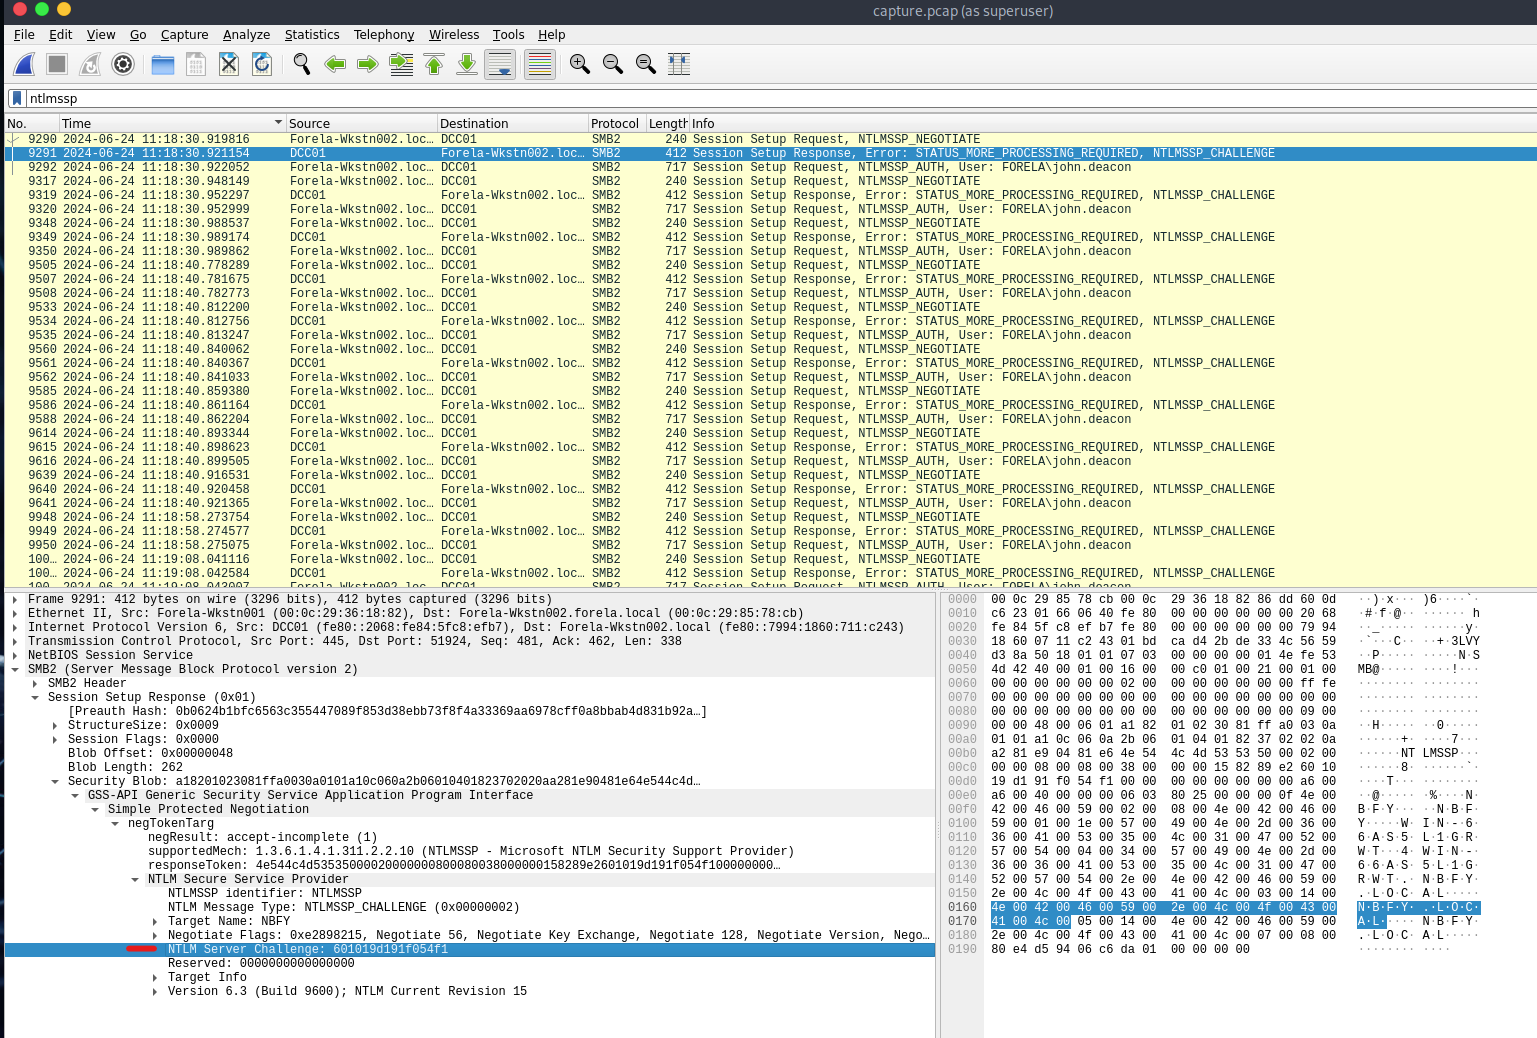
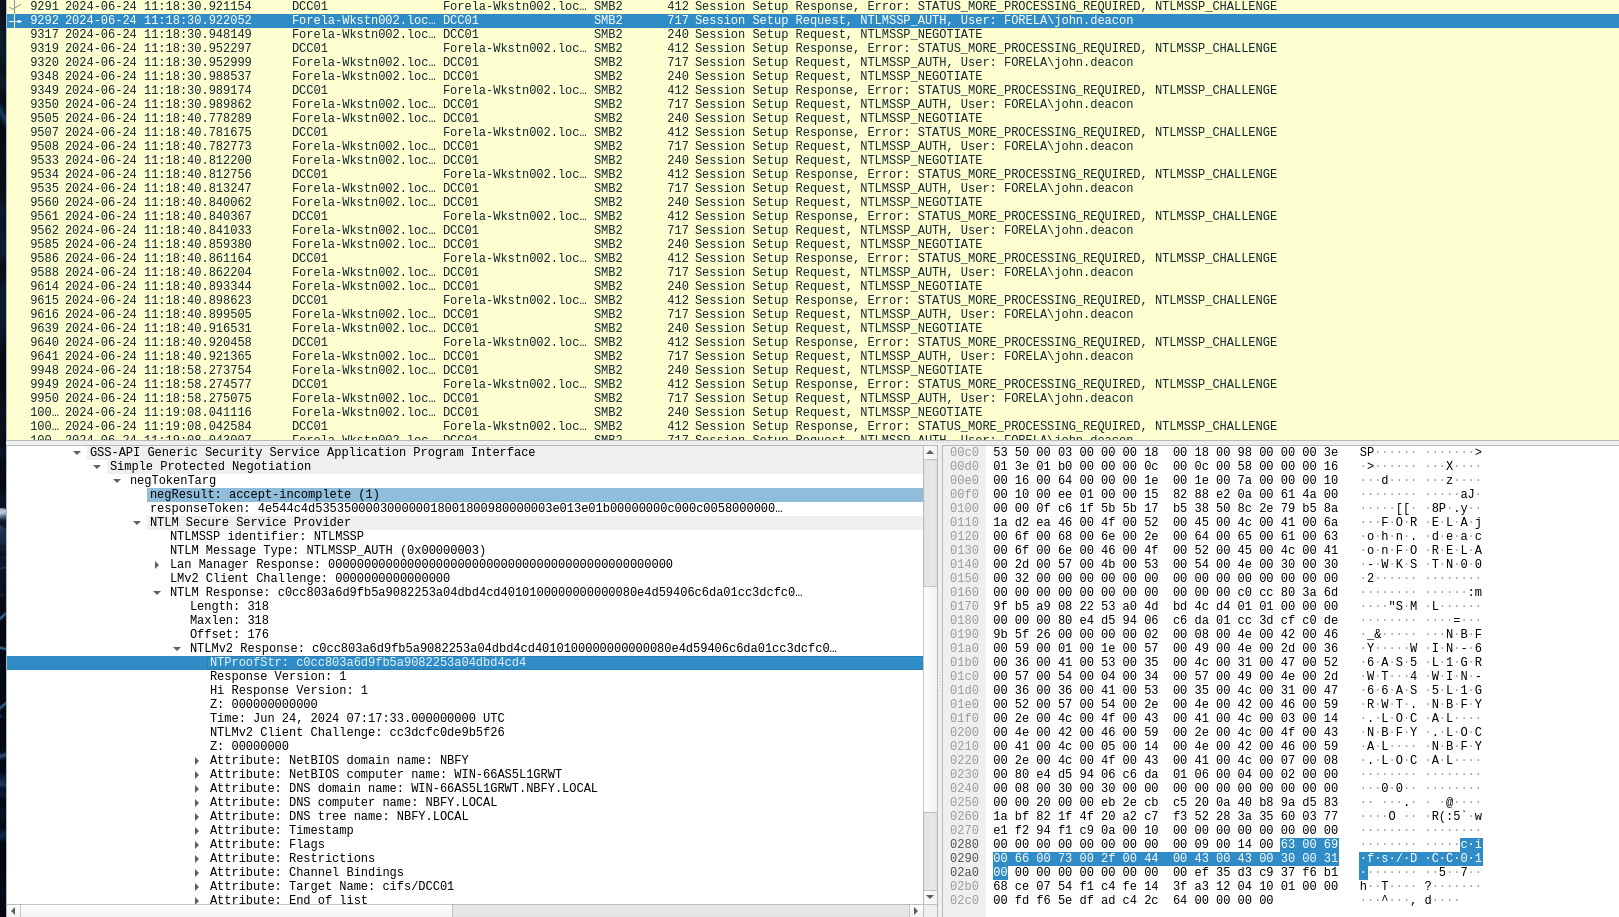
Step 7: Extract NTLM Server Challenge Value
- Add
ntlmsspfilter again. - Go to the
NTLMSSP_CHALLENGEpacket. - Path:
SMB2 -> Session Setup Response -> Security Blob -> NTLM Server Challenge
Step 8: Find the NTProofStr Value
- Locate the
NTLMSSP_AUTHpacket just after the challenge. - Navigate similarly through the protocol stack to find
NTProofStr.

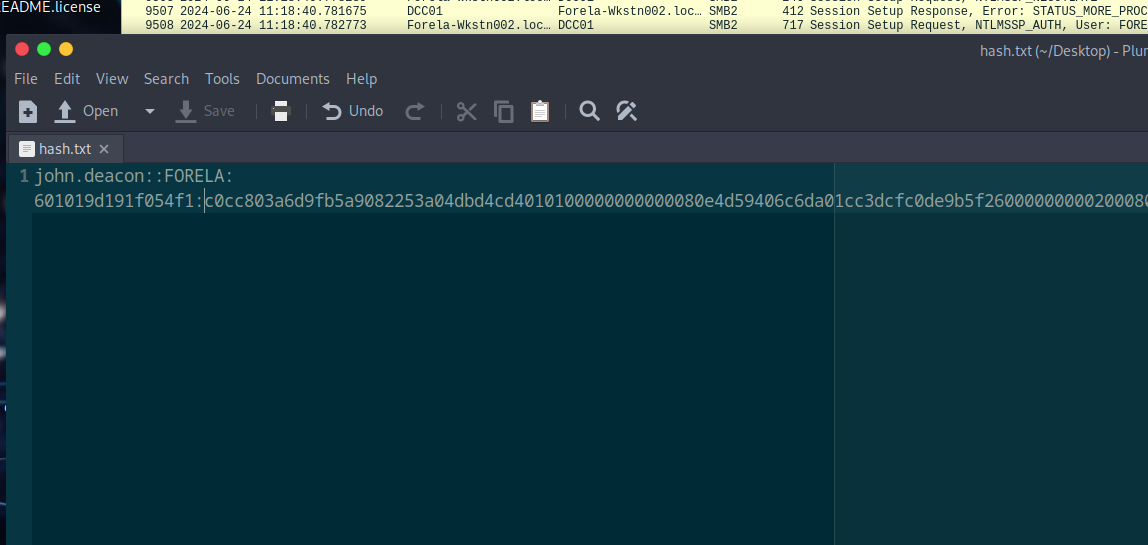
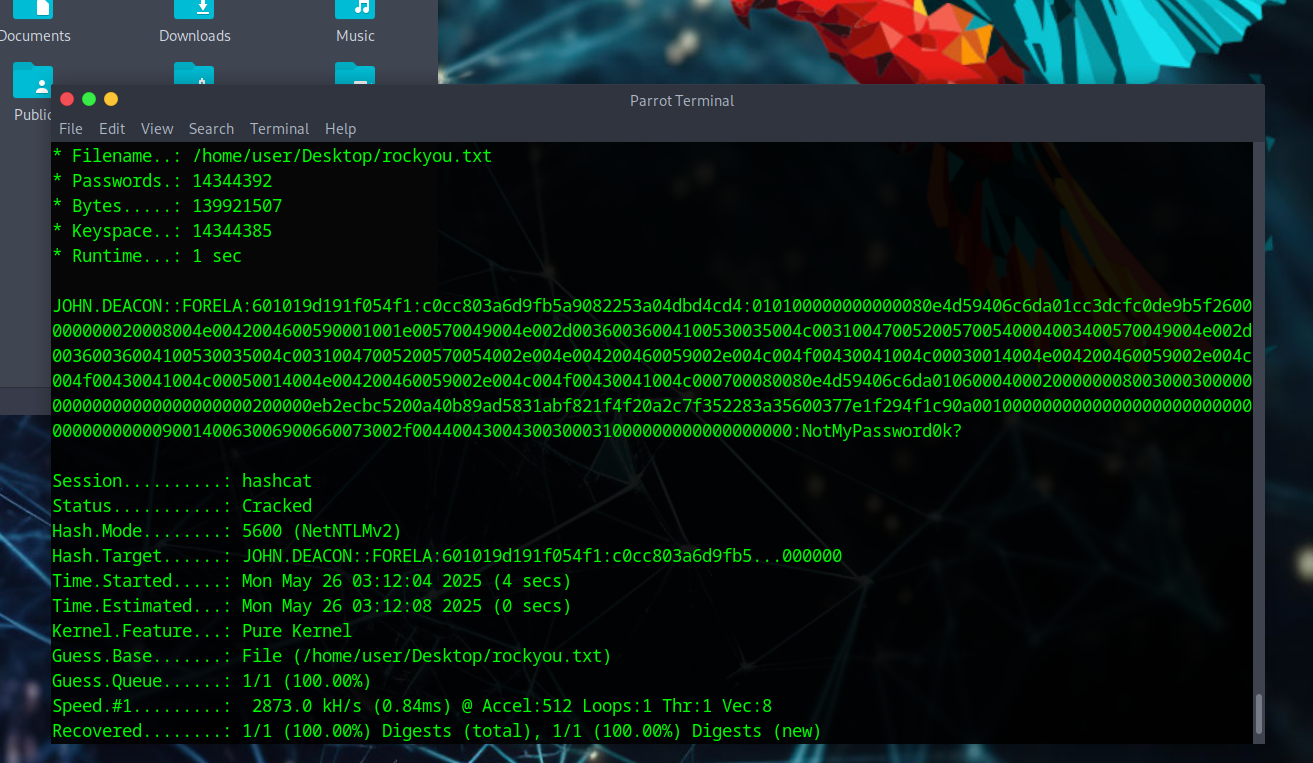
Step 9: Crack the Captured Hash
-
Construct your hash in the following format:
Username::Domain:ServerChallenge:NTProofStr:NTLMv2Response (without first 16 bytes) -
Save to a file and use:
hashcat -a 0 -m 5600 /path/to/file/hashfile.txt /path/to/file/rockyou.txt
Note: Don’t forget the colon after NTProofStr – it’ll save you 30 minutes of frustration.
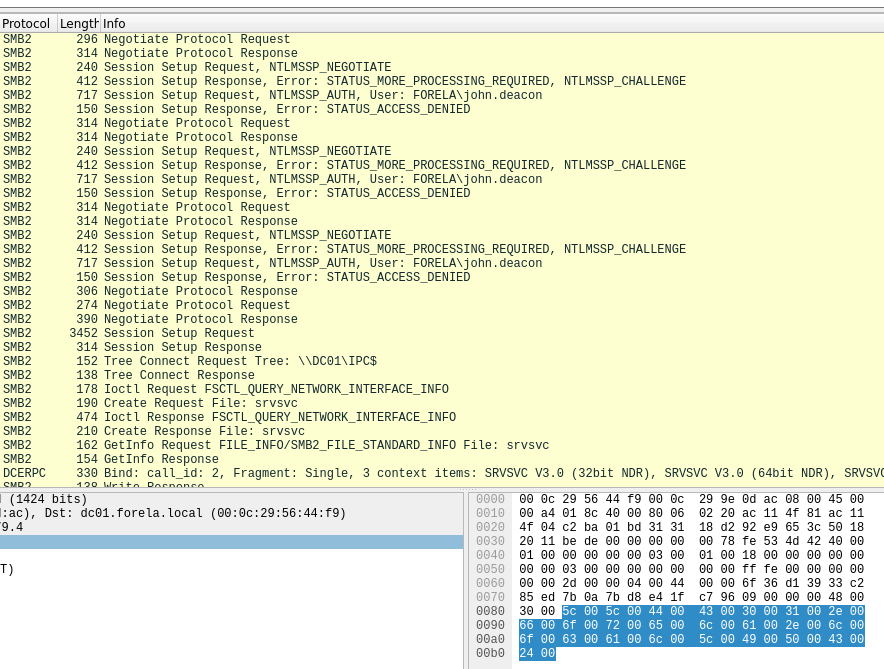
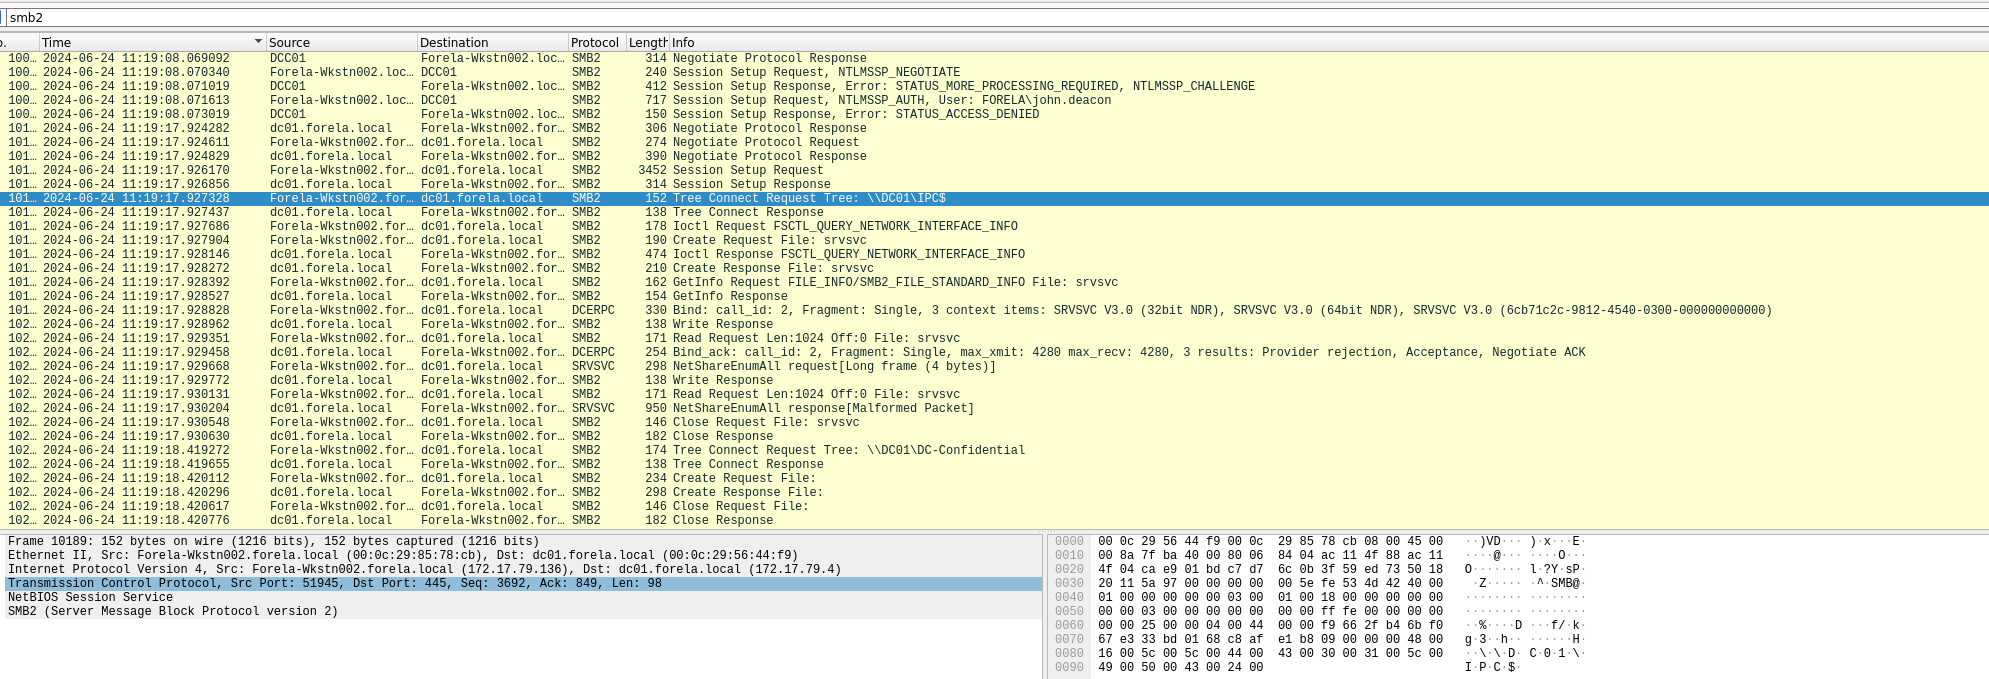
Step 10: Identify the Target File Share
- Use
smb2filter. - Look for a non-default file share with a tree connect/disconnect.
- The name should suggest why the attacker was interested.
tags: ntlm - LLMNR - htb - noxious - wireshark